Visual Networking Thinger
Overview⚓︎
Skate over to Jared at the frozen pond for some network magic and learn the ropes by the hockey rink.

Jared Folkins
Jared Folkins here! My favorite Christmas movie is White Christmas. You should find me on the socials and tell me what yours is. You know, I think Santa is right! It truly is better to give than to receive. I love singing Carols with my family! 🎵O holy night, the stars are brightly shining…🎵
Jared Folkins
Santa's got the right idea about giving, and I'm excited to give you a fantastic way to learn networking fundamentals!
This interactive visualization I've created shows you exactly how packets travel, how protocols work, and why networks behave the way they do.
It's way better than staring at boring textbooks - you can actually see what's happening!
Want to dive into some hands-on network exploration?
Absolutely! Hands-on is definitely my style!
Hints⚓︎
Visual Networking Thinger
This terminal has built-in hints!
Solution⚓︎
Packet Delivery Boot Camp⚓︎
Let's dive into Jared's terminal! HEY! Those falling snowflakes look familiar...mine aren't that pretty though...

Looks like we have a mission: Help Santa deliver packets across the internet, one step at a time!
Challenge 1: DNS Lookup⚓︎
Our first task teaches us the fundamentals of how computers find each other on the internet. We need to perform a DNS lookup to discover the IP address of visual-networking.holidayhackchallenge.com.
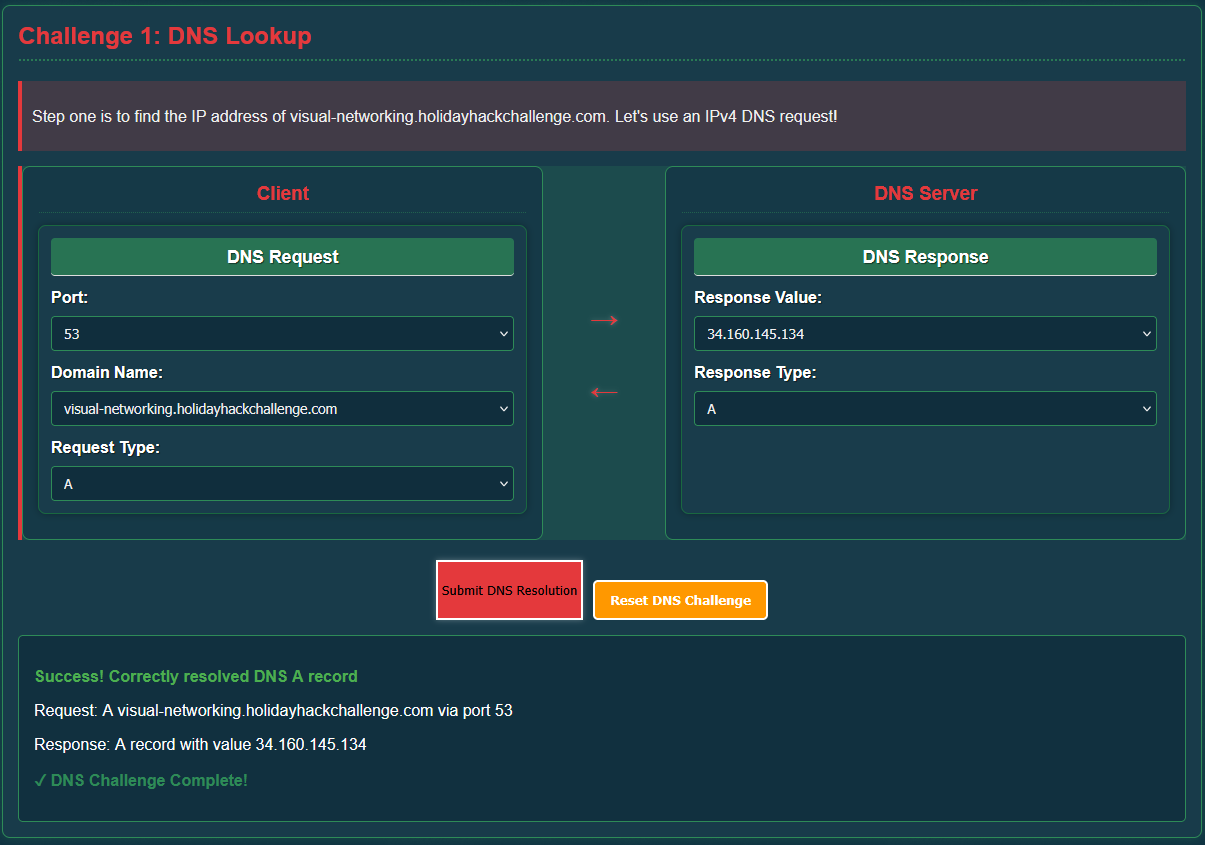
Client Request
- Port:
53(DNS) - Domain Name:
visual-networking.holidayhackchallenge.com - Request Type:
A
Server Response
- Response Value:
34.160.145.134 - Response Type:
A
Success! We just translated a human-readable domain name into an IP address that computers can use! DNS is the internet's phone book in action! (I remember the days of phone books!)
Challenge 2: TCP 3-Way Handshake⚓︎
Now that we know where to send our packets, we need to establish a reliable connection using TCP.
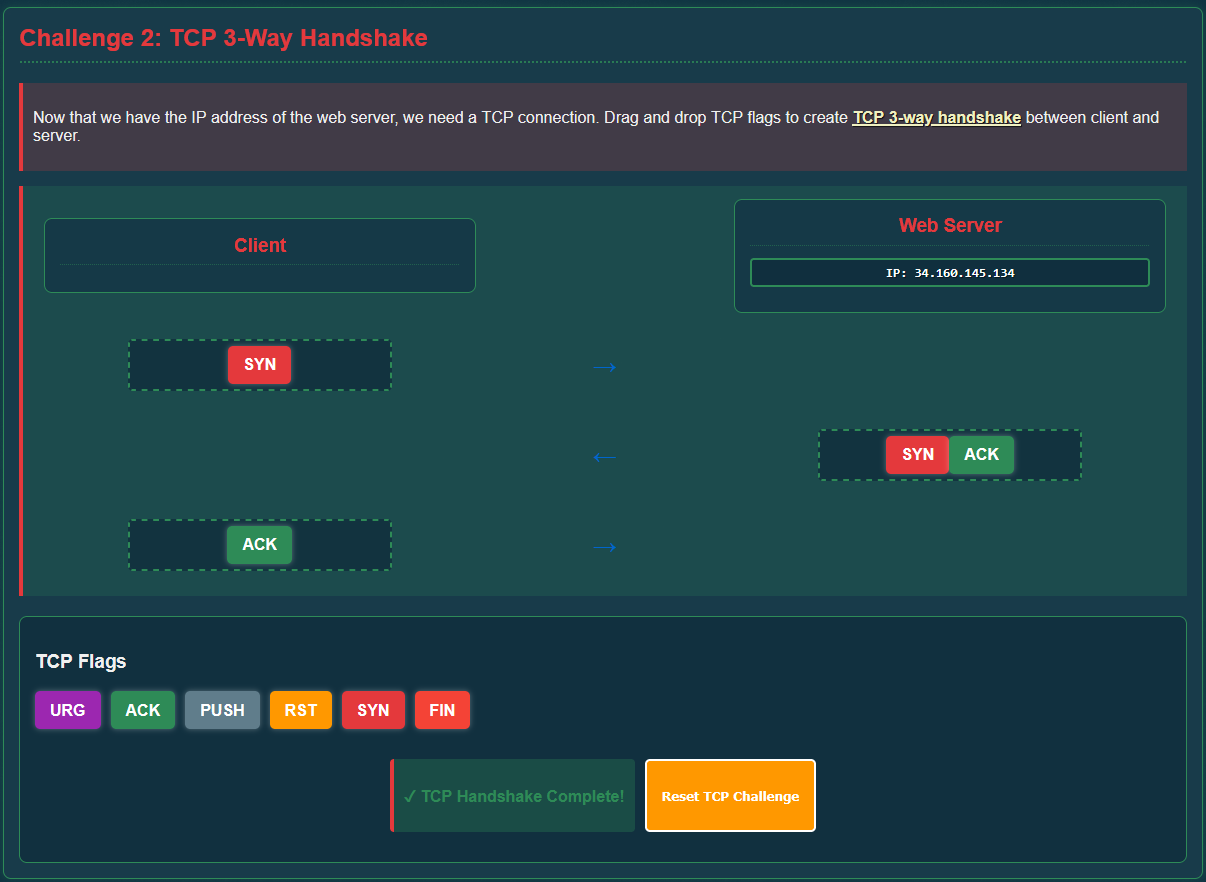
Handshake Sequence
- Client → Server:
SYN(synchronize) - Server → Client:
SYN, ACK(synchronize-acknowledge) - Client → Server:
ACK(acknowledge)
Each party confirms that they're listening before exchanging actual data, and ensures reliable delivery before the data flows. Polite networking at its finest!
Challenge 3: HTTP GET Request⚓︎
With our TCP connection established, we can now make an HTTP (Hypertext Transfer Protocol) request to retrieve the webpage.
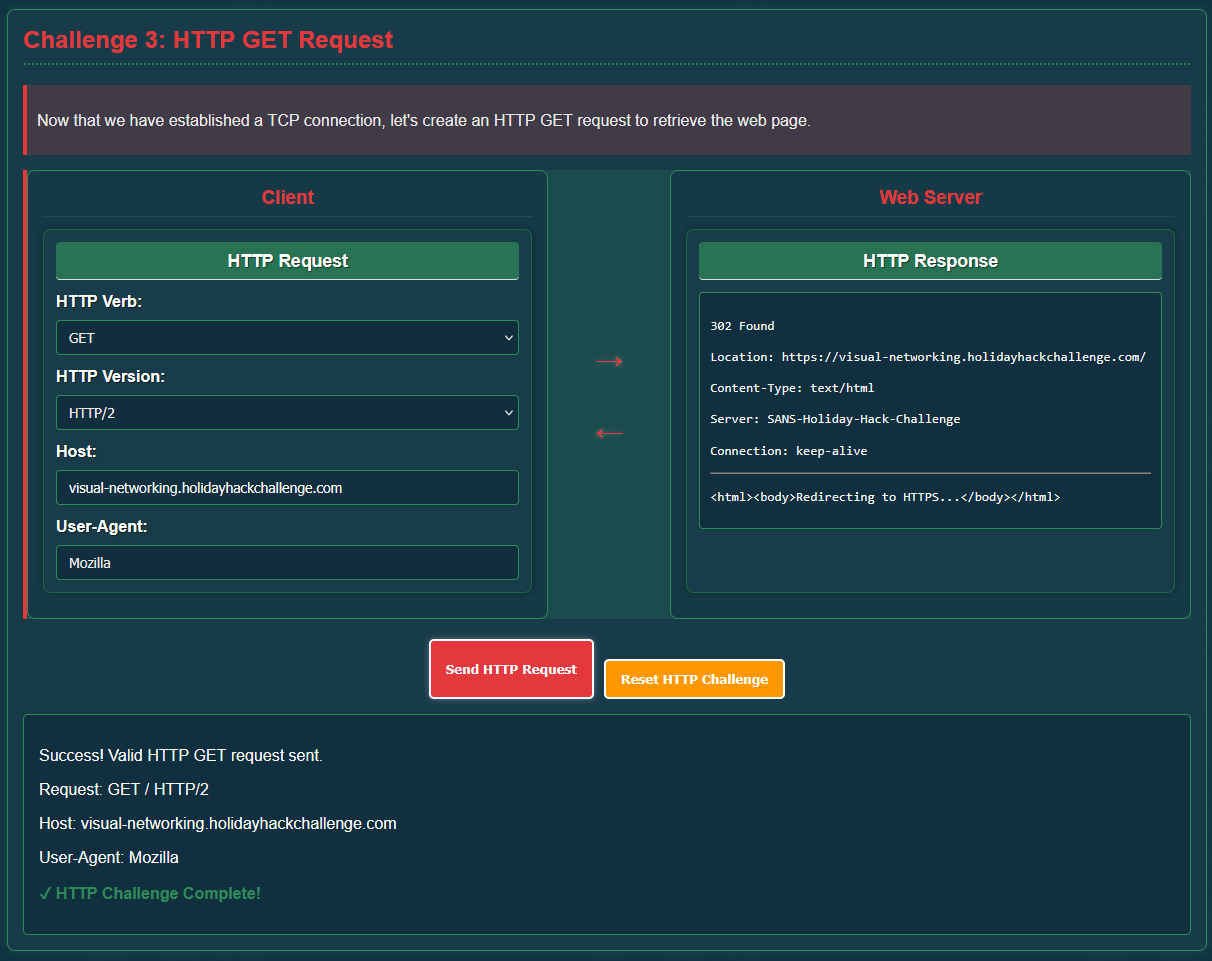
Request Parameters
- HTTP Verb:
GET - HTTP Version:
HTTP/2 - Host:
visual-networking.holidayhackchallenge.com - User-Agent:
Mozilla(I use Firefox, but any User-Agent will do)
The server responds with a 302 Found status that will redirect us to HTTPS. Safety first! The redirect sends us to a more secure area!
Challenge 4: TLS Handshake⚓︎
Now that we are redirected to HTTPS, we need to upgrade our connection to something more secure as well! Time for some encryption magic! To do this, we need to establish a TLS (Transport Layer Security) connection and create an encrypted tunnel for our data.
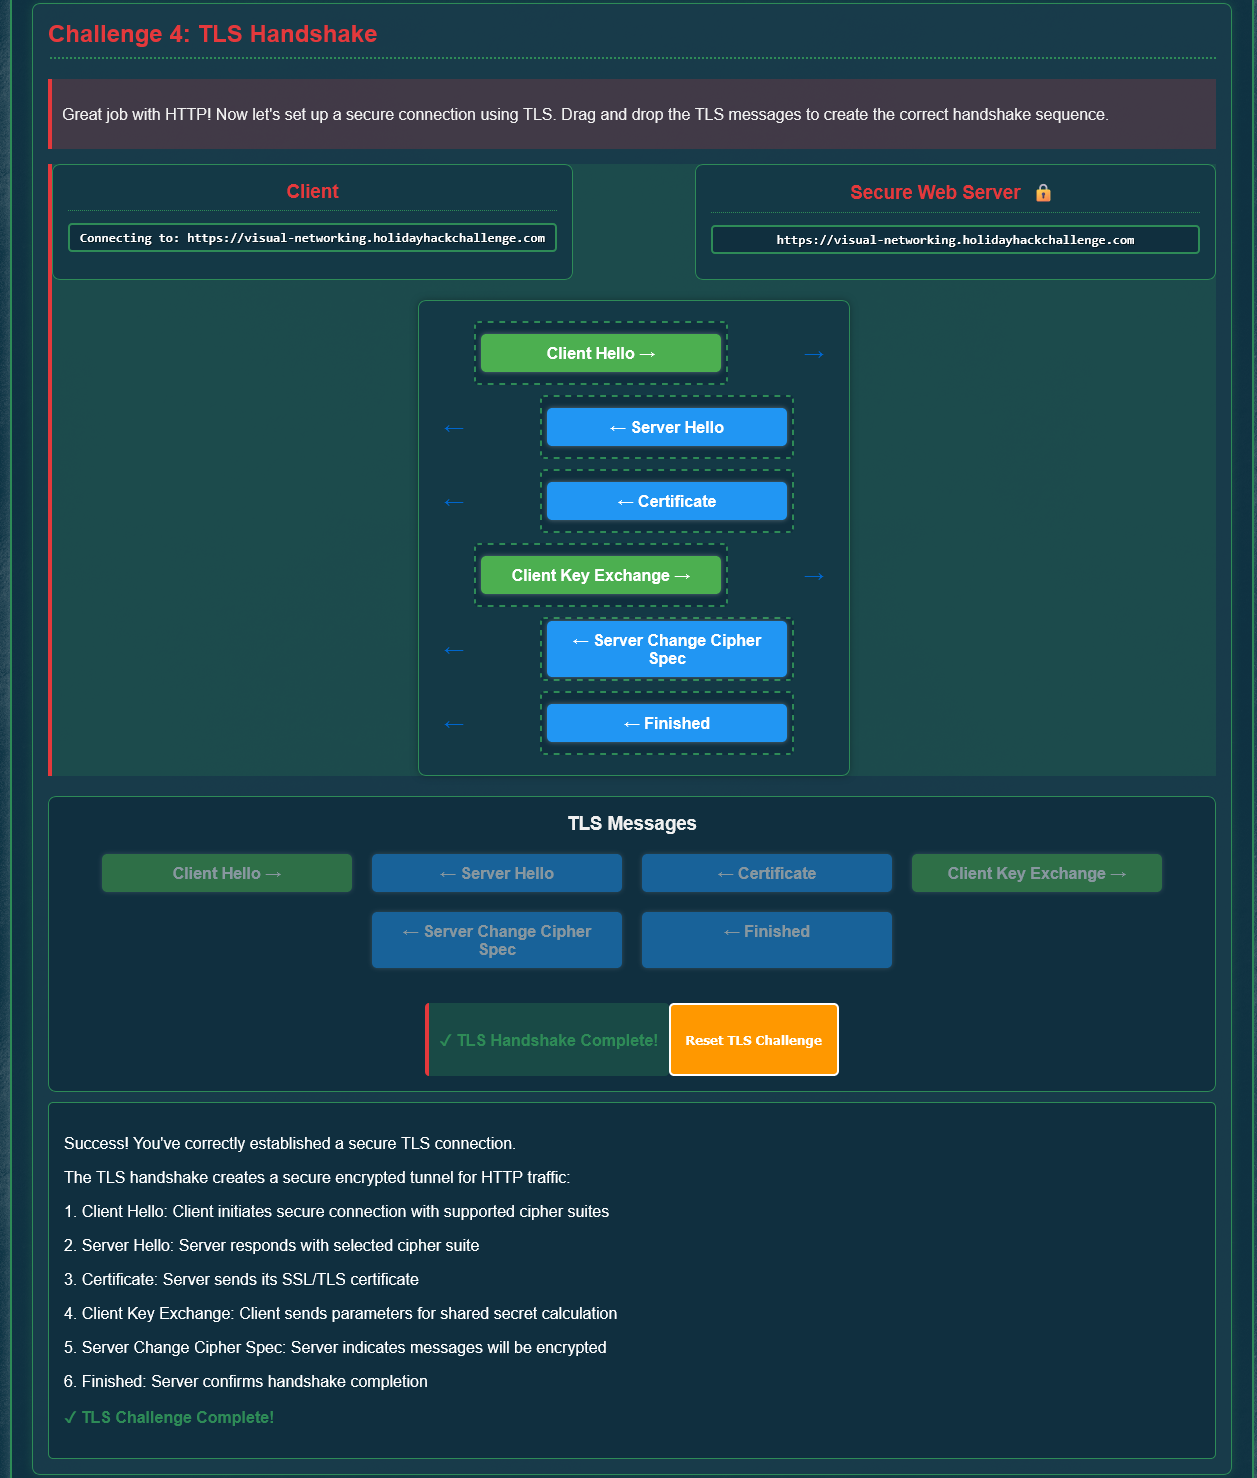
TLS Handshake Sequence
Client HelloServer HelloCertificateClient Key ExchangeServer Change Cipher SpecFinished
Phew, that was quite the process, but it's incredibly important to secure our messages from interception!
Challenge 5: HTTPS GET Request⚓︎
Finally, now that our secure TLS tunnel is established, we can make our HTTPS request. It's identical to the earlier HTTP request but now everything is encrypted! Same commands, way more security!
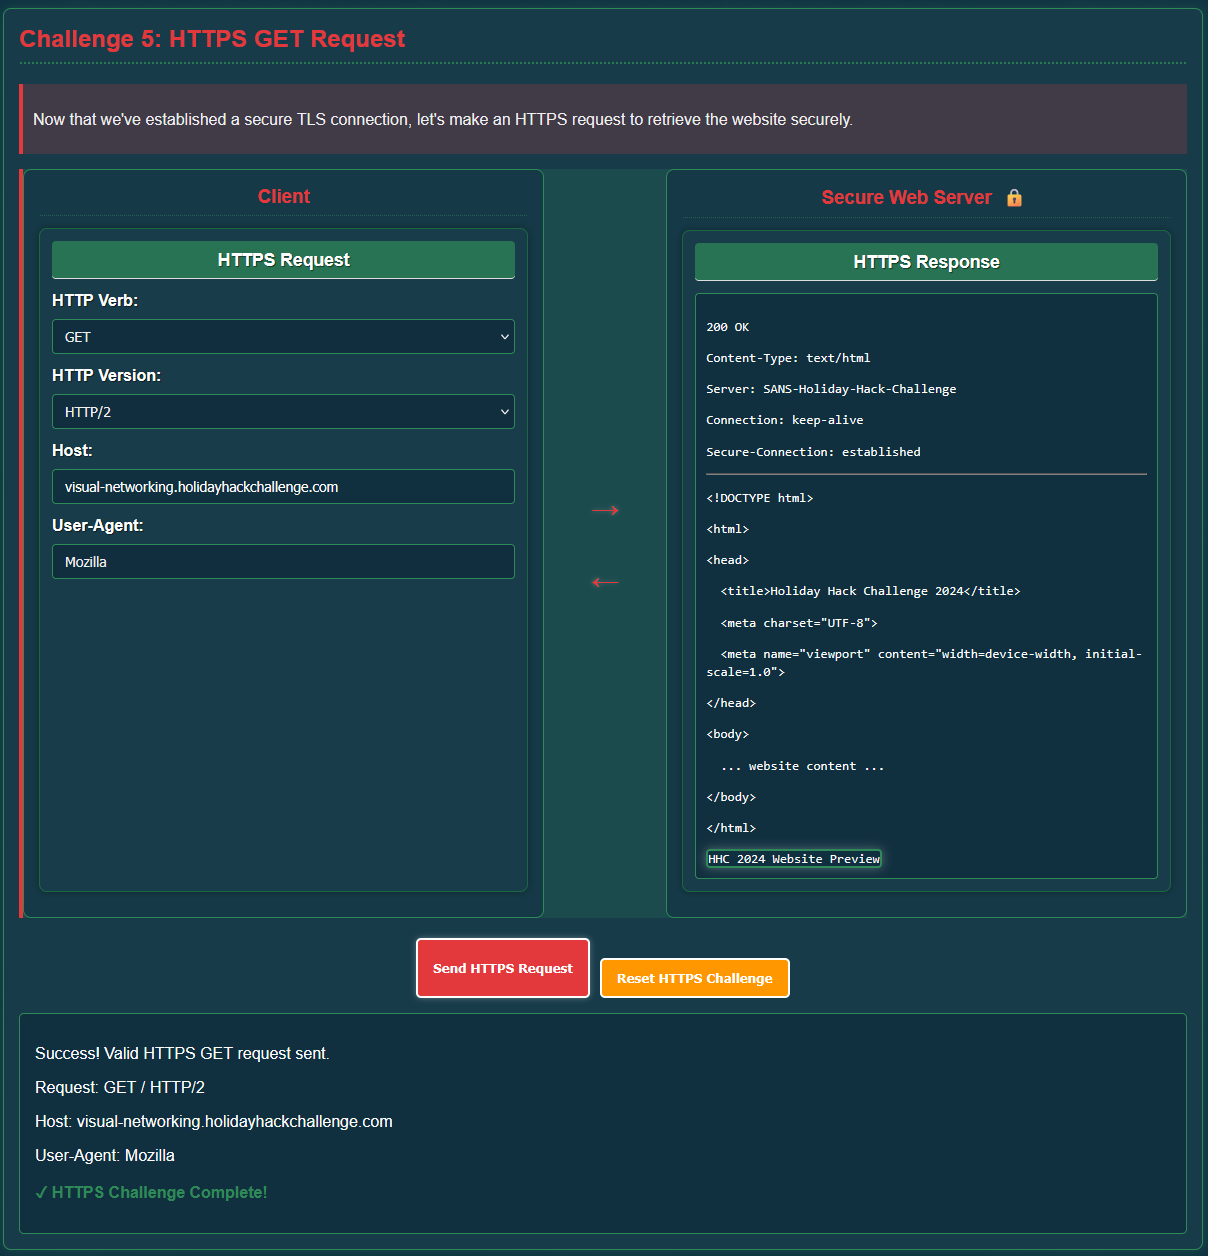
Request Parameters
- HTTP Verb:
GET - HTTP Version:
HTTP/2 - Host:
visual-networking.holidayhackchallenge.com - User-Agent:
Mozilla
Now our server responds with a 200 OK and delivers the HTML content, with confirmation that we have a secure connection! Mission accomplished!
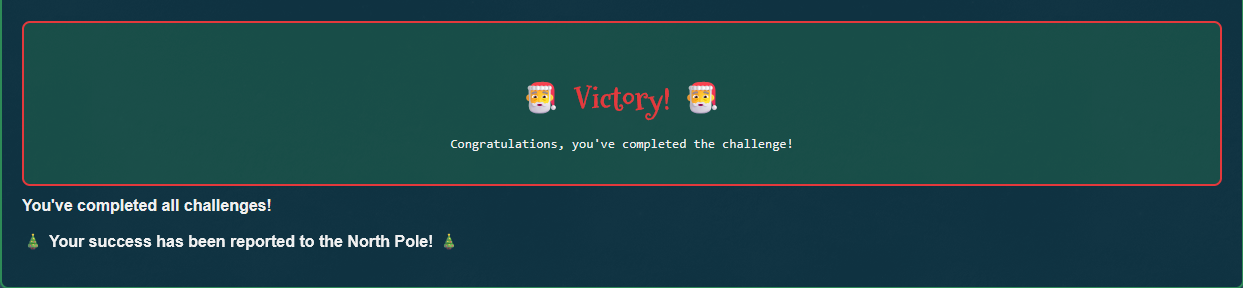
Victory!! Our success has been reported to the North Pole! I hope this means I'll be getting a pair of 24GB Nvidia RTX 3090 Founder's Editions for my future LLM project! (fingers crossed)